


How tos, Tips, Tricks and More
Get more from Groopit with these how tos, tips and tricks.
- Recognize value of sharing data
- Promote reporting by multiple members
- Get the group talking about project highlights
- Perfect your Groopit onboarding experience
- Provide access via email
- Cut through the noise and get their attention with messages
- Create a user-friendly URL to invite people
- Provide a clear purpose and direction
Focus AI with search & filter and then generate insights with AI
With the AI Focus search and filter features, you and your team be able to focus the AI on precisely the right data to find the highlights, insights and patterns you will need to understand your data and solve problems.
Who is this for: All users. Organizer features highlighted

Here’s how
From the Data page, click the filter icon.
Filter by Data model
To filter all data in a Data Model, tick the check box next to the data model name. All data is chosen by default.
Filter by Selected data (See image)
Mouse over the name of the data model and click.
This will bring up a view of the data model.
- Choose which fields you would like to include in the analysis. All fields are selected by default. Click the fields to de-select.
- Filter the data by field. Using the data model as a guide, choose tags, items from a list, and enter a value in a number field to filter data. You can also filter text or Salesfore fields by keyword(s).
- Click on the highlighted text to change the filter criteria. For example, if you want to show all deals $100,00 and above, enter $100,000 in number field box and choose “greater than or equal to” from the options.
- Click “Apply”. The Real-time Data feed will update to show the filtered results.
Note that you can also perform a keyword search within a specific data model. Simply select the data model, click apply, then add your keyword search from the search box.

Save and publish filters
Filters can be saved to an individual users view. Once your filters are applied, click “Save” and give the filter a name.
If you are an organizer, you have the additional ability to Publish a filter so any user can use it. Once the filter is saved, hover over the filter to bring up the options menu, click on the “send” icon.
![]()
Generate AI Insights
Filtered data can then be used to generate AI Insights. The Generative AI will analyze the filtered data and identify highlights, important data, trends and patterns. Just Click “Generate Insights” in the in the “AI insights” panel.
Custom AI Insight: Save questions from Ask Anything Session
Overview
The Custom AI Insight feature allows organizers to save one or more questions from any Ask Anything session and allow users to reuse them across different filtered datasets. This enables consistent, repeatable analysis—perfect for tasks like competitive research, customer profiling, or strategic planning.
With Custom AI Insight, you can:
- Save a single question or a sequence of questions from an Ask Anything session.
- Apply those saved questions to any filtered feed to generate tailored insights.
- Share your custom insights with your group for collaborative use.
You will save time by reusing proven question sets, ensure consistency across analyses, and collaborate more effectively with shared insights.
Sample Use Case
Imagine you’re building competitor profiles. You filter the feed to a competitor, Acme Corporation, and ask:
- What are this competitor’s biggest strengths and how do I compete against them?
- What are this competitor’s biggest weaknesses and how do I exploit them
- Please create a battlecard for me to pitch against this competitor.
You save these questions as a Custom AI Insight. Later, you filter the feed to another competitor, click your saved insight, and instantly generate a new analysis using the same questions.
If shared with the group, any user can use the Custom AI insight for analysis.
Requirements:
- Organizer permissions to set up and configure the Custom AI Insights
- Groopit Enterprise Subscription
Here’s how
From the Data page
Step 1: Ask Your Questions
- Filter the feed to the data you want to analyze in AI Focus section
- Use Ask Anything to pose your question(s)—either one or a series.

Step 2: Save as a Custom AI Insight
- Click the “Save questions as Custom AI Insight” button in the pale blue bar at the end of the conversation.

A pop-up will appear:
- Name your insight
- Review the included questions
- (Optional) Check the box to share it with your group.

Step 3: Apply Your Insight
You’ll now see a … menu next to the Generate AI Insight button

- Tap the menu

- Choose a standard insight (Generate AI insight (default) or
- Choose the custom insight you want to use, example “Collaboration Analysis”.
- To rename or delete your custom insight (deletion affects all group members),
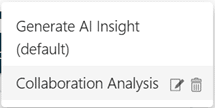 choose the appropriate icon.
 - When a Custom AI insight is selected, the Generate AI insight button will display the name of your custom insight.

Step 4: Reuse Across Filters
- Filter the feed to any dataset.
- Tap the three dots
- Click your custom insight to generate a tailored analysis.
- Note: Custom AI Insights only answer your saved questions—they do not include the standard 100-word summary, patterns, key findings, or aggregated details.
Ask Anything Agent for Microsoft 365 Copilot
The Groopit Ask Anything Agent for Microsoft 365 Copilot is a powerful way to unlock deeper more accurate insights with AI
With the Groopit Ask Anything Agent for Microsoft 365 Copilot, you can:
• Ask any question across your data sets to uncover patterns and opportunities
• Summarize recent activity and notable contributions
• Identify recurring trends and understand their significance
• Detect anomalies and outliers — and their implications
• Track critical changes over time
• Ask open-ended questions to unlock strategic business insights
• Add custom prompts to go even deeper
This agentic approach, powered by Groopit’s structured data models, gives you precise control over AI inputs, enabling Microsoft 365 Copilot to deliver sharper, more relevant insights. And ensures that AI works with the right context — reducing hallucinations and flawed inferences common in other tools.
The Groopit Ask Anything Agent responds with answers supported by citations to the specific source insights, which can be viewed right from within Copilot.
Requirements
You must be a Groopit Professional or Enterprise subscriber.
Admins can control which data the AI analyzes.
For smoother use, IT admins can grant admin consent in Microsoft Entra Admin Center to reduce permission prompts
Installation Steps for Groopit Ask Anything Agent
- Open Microsoft 365 Copilot
- Navigate to Copilot in your Microsoft 365 environment.
- Access the Agent Gallery
- Click on “All agents” or “Explore Agents” to open the Copilot Prompt Gallery.
- Search for Groopit
- In the search bar, type “Groopit Ask Anything”.
If you do not see the Groopit Ask Anything Agent, you may need to ask your Copilot administrator to add permissions for the Groopit Ask Anything Agent.
Add the Agent
- Select Groopit Ask Anything from the search results.
- Click “Add” to install the agent.

Start Using Prompts
Once installed, the agent will open with sample prompts at the top. You can use a default prompt or type your own into the “Message Copilot” box.
Privacy and Security
Groopit data is never used to train AI models. Data from one company is never co-mingled with another. The agent conforms to Groopit’s security standards and is hosted on Microsoft Azure.
Extractive AI
Groopit Extractive AI captures structured data from unstructured and structured sources—like emails, documents, images, websites, and spreadsheets—into a Groopit data model.
Extractive AI can be used to assist users in completing data models from existing source data. It uses the structure and prompts in the data model to extract information from text, emails, documents, images with text, PDFs, web pages, and web applications such as Microsoft Word, Microsoft PowerPoint, Microsoft Outlook, Google Docs, Google Slides, and Gmail.
Users can extract information from websites, emails, Slack/Teams messages from the clipboard with a single click then reviewing and approving what the AI has extracted.
Extractive AI can pull information from a single source, clipboard or document, as follows:
Single Extraction
This default setting extracts one set of data from a source using a single data model—ideal for quickly pulling competitive intelligence from a document or email with a single click.
Multiple Extractions
This advanced setting allows users to extract multiple pieces of similar
information from a source document, such as multiple prices from a competitor’s bid or multiple pieces of product feedback from call notes.
Multiple Extractions by Row
This advanced setting allows users to extract multiple rows from a spreadsheet or a table. This extraction is limited to information stored literally within spreadsheet or table rows; no surrounding information is included.
This setting supports importing 50-100 rows of data depending on the number of columns.
Extract from Clipboard
To extract text from the clipboard. Best used for articles, websites, emails, or blocks of text that can easily be copied to your device’s clipboard.
- Copy the desired text or image to the clipboard (Ctrl-C).
- Open the relevant data model in Groopit. The data model instructs the AI what to extract.
- Tap the Extraction icon

- Choose “Single Extraction” (default), -> “clipboard”

- Click the Extraction icon in prompt.

- Review the results and click “Share”.
Extract from a document into a single instance
To extract from a document into a single instance, including Word documents, PDFs, and Excel files:
- From Groopit, open the data model which will tell the AI what to extract.
- Tap the Extraction icon.
- Choose “Single Extraction” (default), -> “document”
- Choose the document that you want to extract information from. The AI will analyze the document and extract the relevant information using the instructions from the data model.
- Review the results and click “Share”
Extract from an image into a single instance
To extract from an image containing text (in JPG or PNG format) into a single instance:
- From Groopit, open the data model which will tell the AI what to extract.
- Tap the Extraction icon
- Choose “Single Extraction” (default), -> “image”
- Choose the image that you want to extract information from. The AI will analyze the image and extract the relevant information using the instructions from the data model.
- Review the results and click “Share”
Extract from a document into multiple instances
To extract from a document into multiple instances of the data model.
- From Groopit, open the data model which will tell the AI what to extract.
- Tap the Extraction icon
- Choose “Multiple Extractions”, -> “document”

- Choose the document that you want to extract information from. The AI will analyze the document, and extract the relevant information and put it into multiple reports using the instructions from the data model.
- Review the results and click “Share”
Extract from a spreadsheet or table
To extract from a spreadsheet or table into multiple instances of the data model:
- From Groopit, open the data model which will tell the AI what to extract.
- Tap the Extraction icon
- Choose “Multiple extractions by row”, -> “document”

- Choose the document that you want to extract information from. The AI will analyze the document, and extract the relevant information and put it into multiple instances using the instructions from the data model.
- Review the results and click “Share”
Set up the Groopit App for Slack
Groopit’s Slack integration transforms everyday conversations into structured, actionable data. With the Groopit App for Slack, your team can share intel instantly—without ever leaving the channel. Whether it’s competitive insights, customer feedback, or operational updates, Groopit captures it all and delivers it to the right people, in real time.
Who is this for: Organizers
Here’s how
Integration Requirements
- You must be the administrator of an existing Groopit set up to use the Slack integration. If you don’t have a Groopit, schedule 15 minutes with Groopit to help you set one up.
- Your Groopit email must match your Slack user email. If yours does not, email help@groopit.co.
Connect Groopit to Slack
Once Groopit has been set-up it’s time to connect it to Slack.
- From your Groopit, tap Share in the main navigation.
- Tap + Add to Slack above the list of Data Models.
- Review the instructions and tap Add to Slack
- Review the requested permissions, then click Allow
Note: During the installation process, you may be prompted to “request approval for app installation” from the Slack workspace administrator. Follow the Slack prompts to do so.
Once installed, connect Groopit to Slack channels.
- Log into Groopit with administrative privileges, if you arent already logged in.
- Click “About” in the left-side navigation menu
- Tap “Settings” in the upper right corner
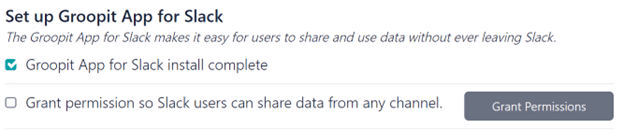
- Scroll down to the “Set up Groopit App for Slack”
- Find “Grant permissions so Slack users can share data from any channel”, and tap the gray “Grant Permissions” button.
This will bring up the Data Sharing page - Tap +Connect new Slack channel

- Select the correct Slack Workspace from the drop-down
- Select the Slack Channel to connect from the drop-down
- Tap “Add”
- Repeat steps 6-9 for additional channels
Click here for the complete installation and configuration guide
Share Data from Slack
Type /groopit and start sharing data right from Slack
You can also connect the Slack integration from your Slack workspace.
- Tap Add app
- Search for Groopit
- Choose Groopit.
- Visit Site to Install
- Review the instructions and Tap Add to Slack
- Review the requested permissions, then click Allow.
Take it on the go with the Groopit mobile app
Results: Members stay more engaged and up to date.
Skill level: Beginner
Prep time: 5 minutes
Why it’s useful:
You’ll get better results more frequently if contributors have a quick, easy way to participate while they’re out and about.
Groopit’s mobile app allows teams to work together seamlessly, see what’s important in the moment, and track progress from anywhere. Organizers can also make adjustments on the fly and invite people to join the group in order to keep momentum rolling.
The app is available on the iOS and Android platforms.


Monitor, pin and flag real-time insights
Groopit makes it easy for everyone to access the latest information, no matter how many people are involved. Organizers can quickly edit or delete reports, and use built-in tools to monitor, pin, or flag updates—ensuring the team stays informed.
Real-time insights appear in chronological order, but when one needs to stand out, pinning gives it top priority so it won’t be missed. Unpin anytime to return it to its original spot. Flags help communicate status at a glance—like “under review,” “closed,” or “completed.” Organizers define and apply flags to fit the needs of any project.
Here’s how:
Edit and delete reports
- Tap the three dots on the report you want to change and tap Edit or Delete.
- If you are editing a report, make sure to tap Save once you’ve made changes.
Pin a report
- Tap the three dots on the report that you want to Pin.
- Tap Pin post. To unpin the report, select Unpin post.
Flag a report
- Tap the three dots on the report you want to flag.
- Tap Flag and choose a flag or choose Manage to add additional flags.
- To add a new flag, tap Manage flags. Type in the name of the flag and tap the +. After you have added all additional flags, tap Save.

How to Check and Update Your Group’s Privacy Settings
Controlling your group’s visibility ensures the right people can see, join, and share your group, while keeping sensitive information protected. You can choose between restricted and public access and update these settings anytime.
- Restricted (default). When selected, access to this group is restricted to specific people who have been granted permission by the organizer through email invitations, Slack or Slack channel membership, Teams or Teams channel membership, Salesforce permissions, groups from your identity provider, or any combination of the above.
- Public. When selected, this group allows participation by anyone, inside or outside the organization, provided they have a link to the group.
Steps to update
- Tap About in the menu
- Tap Edit in the upper right corner and scroll to the bottom
- Change any settings by tapping the circle next to the setting you want. All groups set to Restricted by default.
- Tap Save
Accessing Groopit
Results: New team members are ready to contribute.
Skill level: Beginner
Prep time: 15 minutes
Why it’s useful:
As a member of a team powered by Groopit, your insights and contributions are invaluable. Before you can start contributing real-time data, take action, and follow what others are contributing, you will need to access Groopit.
You can access a group and begin sharing intelligence, via link, email, Slack, Teams, Outlook or Salesforce.
Here’s how:
Access via link:
- If you have a link to the group, tap the link, enter your email, tap >. Groopit will verify whether you have an account and prompt you to login if you have one. Enter your corporate credentials.
If you dont have an account, Groopit will prompt you to create one. Enter your corporate email and click sign in and follow the prompts to login and you will be taken to the group.
If you company does not support Single Sign-on, you will be asked to create an account with a user name, password. When you create your account, you will need to verify your email as a security precaution. This verification email will come from Groopit@groopit.co. Look in your spam or junk folder if it doesn’t arrive
- If your group administrator has not alrady given you access, tap > to request to join. They will receive your request and verify your access permissions.
- Download the Groopit mobile app and bookmark the web experience so you can find your way back to the Groopit.
- Share your first intelligence by tapping the data models at the top of the page! You can look through data for examples.
Access via email:
- If you received an email invitation, open the email and click Join.
- You will be asked to sign in. You organization should have Single Sign-On established so you can sign-in with your corporate credentials.
- Enter you email, and press sign-in. You will be taken to your corporate sign-in. After enter your corporate email and password, you will be returned to the group and are ready to share data.
- If your company has not setup single sign-on, then you will be asked to create an account with a user name and password, if you don’t have one. When you create your account, you will need to verify your email as a security precaution. This verification email will come from Groopit@groopit.co. Look in your spam or junk folder if it doesn’t arrive.
Access via Slack, if applicable
- Go to the channel where you want to share intelligence, type /groopit and press return.
- This first time you try to share intelligence, you will need to connect your Groopit and Slack accounts. Tap sign in. Follow the prompts to sign-in with your corporate credentials.
- Once signed in, return to Slack, type /groopit, click “Enter” twice and you a Groopit window will open.
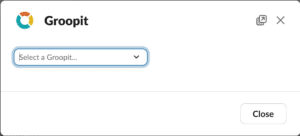
- Choose the group where you want to share data from the drop-down menu
- Choose the data model from the drop down menu.
- Fill out the data model and click “Share”. The report will be shared in Slack and aggregated in Groopit, automatically,
Access via Teams, if applicable
- Go to the channel where you want to share intelligence, tap “+” at the bottom of the chat box, choose Groopit from the drop down.
- This first time you try to share intelligence, you will need to connect your Groopit and Teams accounts. Tap “Sign-in.” Follow the prompts to sign-in with your corporate credentials.
- Once signed in, return to Teams,tap+, find Groopit. A window will open with a list of groups and data models.
- Choose the data model from the menu.
- Fill out the data model and click “Share”. The report will be shared in Teams and aggregated in Groopit, automatically,
Collect real-time data with Groopit Data Models
Groopit Data Models define the real-time data employees share, as well as the data AI extracts, across systems and departments.
Data models can be set up to gather information about anything – competitors, sales, operations, product gpas, customer satisfaction, emplyee experience, merchandising, success – the options are limitless.
And changes you make to a Data Model instantly propogate across enterprise systems so you can operate with total business agility.
Contact your customer success representative to request the Groopit Data Models Resource Guide. It covers all the basics including best practices and how they leverage artificial intelligence (AI)
Create a data model and launch it when you’re ready
As teams share intelligence, it’s natural to evolve your data models to capture new insights. Groopit makes this easy: you can set models to inactive while refining them, then activate when ready. Once activated, updates are instantly applied across enterprise systems—so your organization can move with speed, precision, and confidence.
Here’s how
- Tap Share.
- Tap Create new Data Model.
- Add a title to make it clear which data model to use.
- Add instructions so people know what to collect and why.
- Add data fields to collect precisely the right intelligence and direct the AI. Data fields including text, numbers, tags, lists, date, picture and location. This may be one of each type of field or multiple fields.
- Check the settings. By default, everyone can use the Data Model to share data. The status is set to Active and only the title of the Data Model will appear above the Data feed.
- Tap the blank circle by Inactive to make the Data Model Inactive.
- Tap Add.
Make Data Model active
- When you are ready to use the Data Model, tap Share, scroll down to Inactive, tap the three dots by the Data Model you want to activate and choose Make Active.
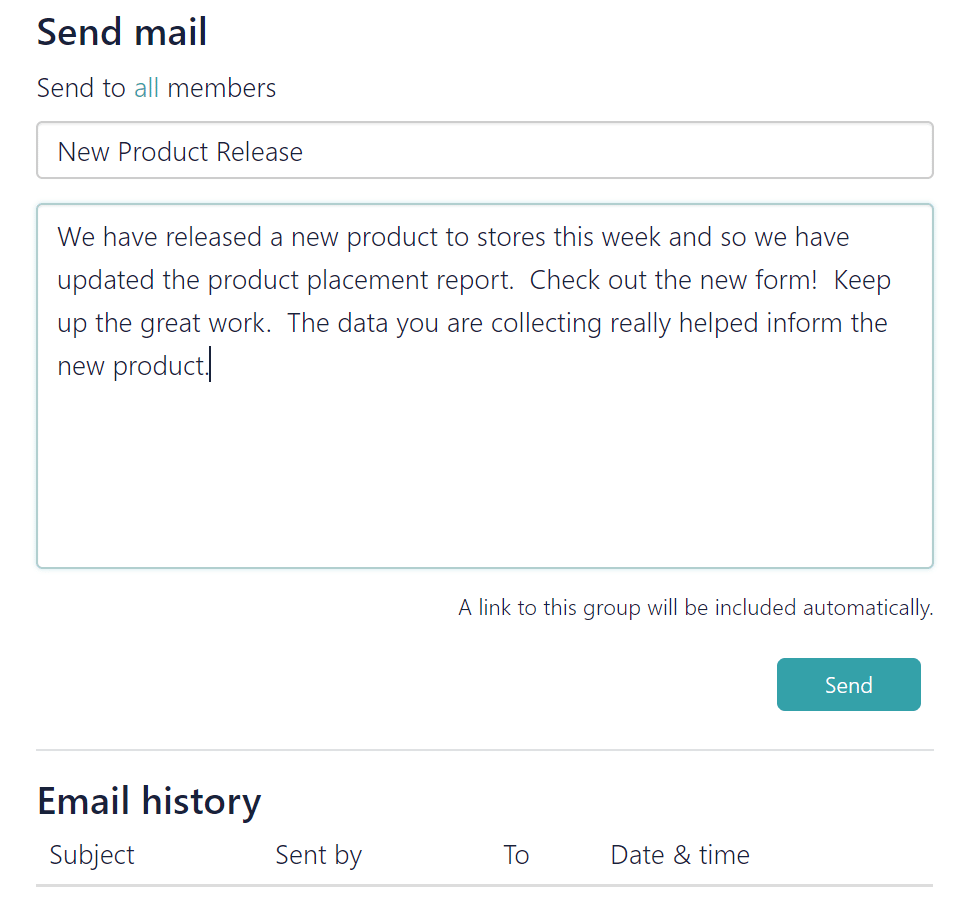
- After the Data Model is active, if appropriate, send a message to the group letting them know there is a new insights to share. Tap Users, tap “send email” in the upper right corner.
- Choose which users to email, the default is all users. Edit the title, write a message, then tap Send. A link to the group will automatically be included.
How to make data visible only to Organizers
Some data collected in Groopit is meant for organizers only. This feature allows you to hide specific fields so that only organizers can view them, helping maintain confidentiality and control over sensitive information.
Some data that is collected does not need to be seen by the whole group. Organizers can control data visibility settings and hide data fields that shouldn’t be accessible to the whole group.
Here’s how
- Tap Share.
- Tap the three dots by the Data Model you want to edit or choose +Add an Data Model.
- Scroll Data Fields.
- Find the field you want to modify, and tap the three dots
- Tap “Make hidden”. An icon will appear in the field showing the modification.
- When a user shares data only the organizers will see that data in the Real-time Data Feed.
Add a view for real-time visibility into your aggregate data
Groopit Views display aggregate data, calculate results and help everyone see the big picture. Everyone on the team can see who is engaged, track progress to goals, count reports and visualize aggregate data for additional insight, all in real-time.
There are 7 views you can use:
- Counter: Displays the number of times data has been shared using a data model or specific field in a data model.
- Counter with Total: Displays the number of times data has been shared using a data model or specific field in a data model during a selected time period (day, week, month) and along with the total number of shares overall.
- Progress Meter: Tracks progress toward a sharing goal. Displays both the number of shares and the percentage completed. The goal is set by an administrator.
- Leaderboard by person: Ranks individuals based on how many times they’ve shared intelligence. Displays names and share counts.
- Leaderboard by Choice: Ranks tags or list options based on how often each has been used in a data model. Displays choice and share counts.
- Bar chart: Visualizes the number of times data has been shared using a data model or specific field in a data model in a bar chart for a selected time period (day, week, month).
- Map view, if you are collecting location: Displays each location shared on a map. Users can click on the location to see the underlying intel.
Note, users can click on any of the counts and the Real-time Data will display the underlying data.
Here’s how
- Tap Views.
- Tap Add a view.
- Choose Data Model to view the collected data.
- From Field drop down, choose data, such as “Count of reports” for a count of all reports or “Count of [field name]” for a count of a specific data field.
- Choose the view you want. Groopit will only display the options available for the data in the field or data model.
- Choose who should be able to see the View.
- Select a date range, if applicable.
- Add a title.
- Add a description, if applicable.
- Add a label for the data to be displayed
- Start the counter at the correct number, if not zero.
- Tap Publish.
Map data using location data field
Results: Mapping of your data that can be embedded in a website.
Skill level: Intermediate
Prep time: 5 minutes
Why it’s useful:
If your team is collecting location data, it’s helpful to see that information on a map so people know where things are happening.
Any report that gathers location data can be displayed on a map to see location-specific data for your project like business locations, activity locations, and more. If you have added tags to your Data Model, the view can also be filtered by tag.
Here’s how
- Add a location field to an Data Model.
- Add a tag data field with appropriate tags to filter the points on a map, if applicable.
- Tap Views.
- Tap Add a view.
- Choose Data Model to be mapped.
- From Field drop down, choose “Map of”
- Choose who should be able to see the Map view.
- Select a date range, if applicable.
- Choose any tags to filter location, if applicable.
- Add a map title.
- Add a description, if applicable.
- Tap Publish. The map will appear in the view.
How to Download Data
Groopit makes it easy to export collected data for analysis or integration with other systems. You can download all shared data, data from a search or filter result or data all data from a single data model. Data can be downloaded to a comma separated file (csv) or a text (txt) file.
Steps to Download all data:
- From Data.
- Find the “AI Focus” section in the middle column.
- Tap Download Data.
- Choose the data format: csv or txt
- The data will automatically download into a zip file. Data from each data model will be saved in a unique file.
Steps to download filtered results
- From Data.
- Find the “AI Focus” section in the middle column.
- Filter your data
- Tap “Download Data”
- Choose the data format: csv or txt
- The data will automatically download into a zip file. Data from each data model will be saved in a unique file.
Steps to download data from a single data model
- From Share.
- Find the Data Model that has the data to be downloaded.
- Tap the three dots at the lower right corner of the Data Model.
- Tap Download Data. A csv file will automatically be downloaded.
Using Odata to export data from Groopit
Groopit supports OData feeds for bulk (read-only) export of data shared in Groopit Data Models.
Accessing Groopit OData Feed
The OData feed URL for a Data Model is located on the Download Data page along with the Download CSV/TXT options.
To access:
- Tap Views on the navigation menu
- Tap Download Data
This will bring up the Download data page.
- Choose the correct Data Model from the drop-down menu.
- Select OData Feed from the Data Format drop-down menu.
- Select “Anyone with the link can download data”.
- Copy the URL link (sometimes referred to as a Service URL) to use in your application.
You can use the Groopit Odata feed as a Power BI, Excel, Tableau or other BI tools.
Download the instructions for integrating with Microsoft Excel, PowerBI and Tableau.
Recognize value of sharing data
Results: More data, more insights, more empowered team.
Skill level: Beginner
Prep time: 5 minutes
Why it’s useful:
Recognize the value of sharing data and the people contributing it – OFTEN. Whenever someone contributes, lift them up. Employees need to know that the data they are contributing is valued. You’re helping people be part of something bigger, something that works, and yields results.
Here’s how
- Identify who is on point for recognizing contributions – champions, executives, you.
- Recognize contributions in big and small ways.
-
- Share insights, highlights, and results at least monthly. Generate AI insights and then share with users. People want to know that their feedback is being seen and heard.
- Acknowledge each contribution – it can be as simple as an emoji.
- Celebrate wins, milestones, and events – it can be done with a simple announcement.
Promote reporting by multiple members
Results: Faster results and more impact.
Skill level: Beginner
Prep time: 30 minutes
Why it’s useful:
The organizer’s role is not to do it all, but to inspire others to take action. You can amplify your impact, save time, and build group rapport by delegating to key members of your team.
Figure out who can help you report and give them a specific reporting responsibility, which could be as simple as offering encouragement to the rest of the group.
Here’s how
- Brainstorm a list of 10 people, depending on the size of the group, to give specific reporting responsibility
- Talk and email with them to explain their role, and how often they need to report or take other actions.
- Send a follow-up email to anyone who hasn’t joined the group to see what is keeping them from joining. If they need help or have questions, this is your chance to connect.
Get the group talking about progress and highlights
Results: Keep people engaged.
Skill level: Beginner
Prep time: 20 minutes
Why it’s useful:
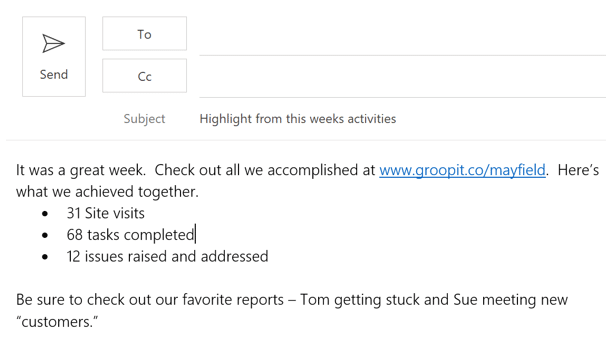
Building engagement in your group helps people stay informed and interact with each other. You can do this by sending a weekly highlights email to showcase reports, highlight work, and give a shout out to team members.
When you send a message using the Groopit email tool, it will include a link back to the group, which helps participants build a habit of checking in and contributing.
Another way to get people talking is to share a short, repeatable story (we call it a Sparkler) in a report or an email. It should be concise, easy to remember, and use conversational language, so one person can tell it to another. Don’t confuse a thank you with a Sparkler, though. Thanking people is an important part of leading your team, but in this case you are telling a story from the group.
Here’s how
Spotlight
- Tap People and scroll down to Members.
- Tap Send Email.
- Create an email that highlights what has been happening in the group and inspires them to check the project to learn more.
Sparkler
- Craft the Sparkler story. Imagine you are telling a friend about something that happened. Can they repeat it? If so you have a Sparkler.
- Make a report including your Sparkler and a photo.
- Optional: Highlight a sparkler in email and send people back to the project to get the details.

Perfect your Groopit onboarding experience
Results: A launch strategy that works for your whole team.
Skill level: Intermediate
Prep time: 60 minutes
Why it’s useful:
When people know what to do, how to do it, and why it matters, they can immediately get to work. You can launch your group quickly and efficiently by making a ten-day plan to get key people on board with a constant flow of information.
Plan your message and content for emails, reminders, updates and social media up front. You can change and adjust as you go, but this step will make launching a group easier. At minimum, you’ll want to craft 4 messages to engage your group. These include:
Introductory message – This is the first communication to potential members, explaining what you’re doing, why, where, how, and the importance of their contribution.
Reminder message – This is a short message reminding people about the introductory message, with a prompt to join the group.
Thank you message – A message for the whole group that includes a thank you to those that have already joined and highlights how many people have already taken this action. Current members will be rewarded for joining and it will encourage others to join the group.
Inspirational leader message – Sometimes you may have to call an inspirational leader or senior person in your organization to help deliver your message. This message should reinforce the important work members of the group are doing, the importance of this work to the organization’s efforts, and model involvement in the group.
Here’s how
- Send an Introductory message. Add a call to action to join the group with a link. Give clear directions about what they should do when they join and add a link to download the Groopit app.
- 2-3 days later send a reminder message. Keep it short with the key details and a call to action to join the group with a link.
- After a week, send a Thank You message to the whole group. Thank people who have already joined and highlight progress towards your membership goal, if you have one. Remember to add a call to action to join the group.
- Write a message for the inspirational leader to send. Work with the leader to get it approved and have them make a report under their name.
- If you are using social media to reach your team members, you can adapt these core messages to social media. Remember to add images to reinforce your message.
Provide access by email
Results: Key people can join the team.
Skill level: Beginner
Prep time: 20 minutes
Why it’s useful:
You can quickly and easily invite multiple people to join your team with an email invitation from within Groopit.
From the Users page, you can enter individual email addresses and send a customized invitation to people so they can share data. Groopit will send an email with a link to join the group. Once the invitation has been accepted, the person will be automatically added to the group. Invitations are specific to an email address. If a user creates an account with a different email address, the invitation will need to be reissued. On the User page, the organizer will be able to see all pending invitations, as well as all people who have access to the group.
Here’s how
- Tap Users.
- Click “Invite Users.”
- Type a message in the the invitation message box. Tap “Preview”, if you would like to see a preview of the message.
- Enter one or more email addresses. Press “Enter” after typing in each email address.
- Choose whether you want to invite people as “Members” or “Administrators”
- Tap Send Invitations
Note, in order to send an invitation, you must enter a message and enter an email address.
Cut through the noise and get their attention with messages
Results: People stay in the know.
Skill level: Beginner
Prep time: 10 minutes
Why it’s useful:
Let’s face it: people on your extended team have a lot going on because they are on the front lines of the challenges you are trying to tackle.
Groopit’s message features and notifications make it easy to reach people in multiple ways, so you can cut through the noise and encourage them to act and collect data on their own time.
Here’s how
- Tap Users.
- Tap Send email.
- Craft a message that prompts members to share intelligence, learn from AI insights, or view aggregated data. You can also send highlights from the groups, AI insights with patterns, important data and trends and follow-up on requests . You will also find a history of all the messages that have been sent.
- Encourage people to turn on notifications in the Groopit app. Each time someone on the team makes a report, everyone will be notified.
Create a user-friendly URL to invite people
Results: Friendly URL that can be used in many communications.
Skill level: Beginner
Prep time: 5 minutes
Why it’s useful:
You’ll probably be sharing the link to your Groopit with a lot of people. A memorable, user-friendly URL catches everyone’s attention and makes it easy to access the group.
If you are planning to reach people by email, or presentation then generating a user-friendly URL is a must. Make it short and recognizable to people you want to invite.
Here’s how
- Tap About.
- Tap Edit and scroll to the bottom of the page and the Friendly URL section.
- Enter the name you want to use in the box and tap Save. If your group name is already in use, you can try entering another name, then tap Save.
- Copy the URL, which will appear like this: https://app.groopit.co/friendlyname
- Copy link into emails, newletters or other company communications
Provide a clear purpose and direction
Results: Team alignment for faster success.
Skill level: Beginner
Prep time: 20 minutes
Why it’s useful:
You’ll want everyone working on your extended team to understand the Groopit’s purpose, why it matters and how they can contribute. When people are on the same page, they are more likely to contribute their valuable time and insights, providing your Groopit with the real-time data you need to make progress. The About page is where people can get instructions, learn how to contribute and understand how the group works so be sure to include that information.
Here’s how
- Tap About and scroll down to bottom of the page.
- Tap Edit.
- Under Purpose, make a short statement about what you’re doing. Try starting with “We are…”
We are speeding up…
We are outsmarting …
We are accelerating …
We are eliminating …
We are tackling…
We are solving…
If someone were skimming the first sentence of your About page, this is what you would want them to learn.
- This is where you will explain why they should take share data, provide more detail about the data you are trying to collect, and emphasize the importance of their contribution. Keep it concise! This section has a 500-character limit.
- Explain the real-time data employees will be contributing. These should explain the Models that people can use to share the precise data you need.